

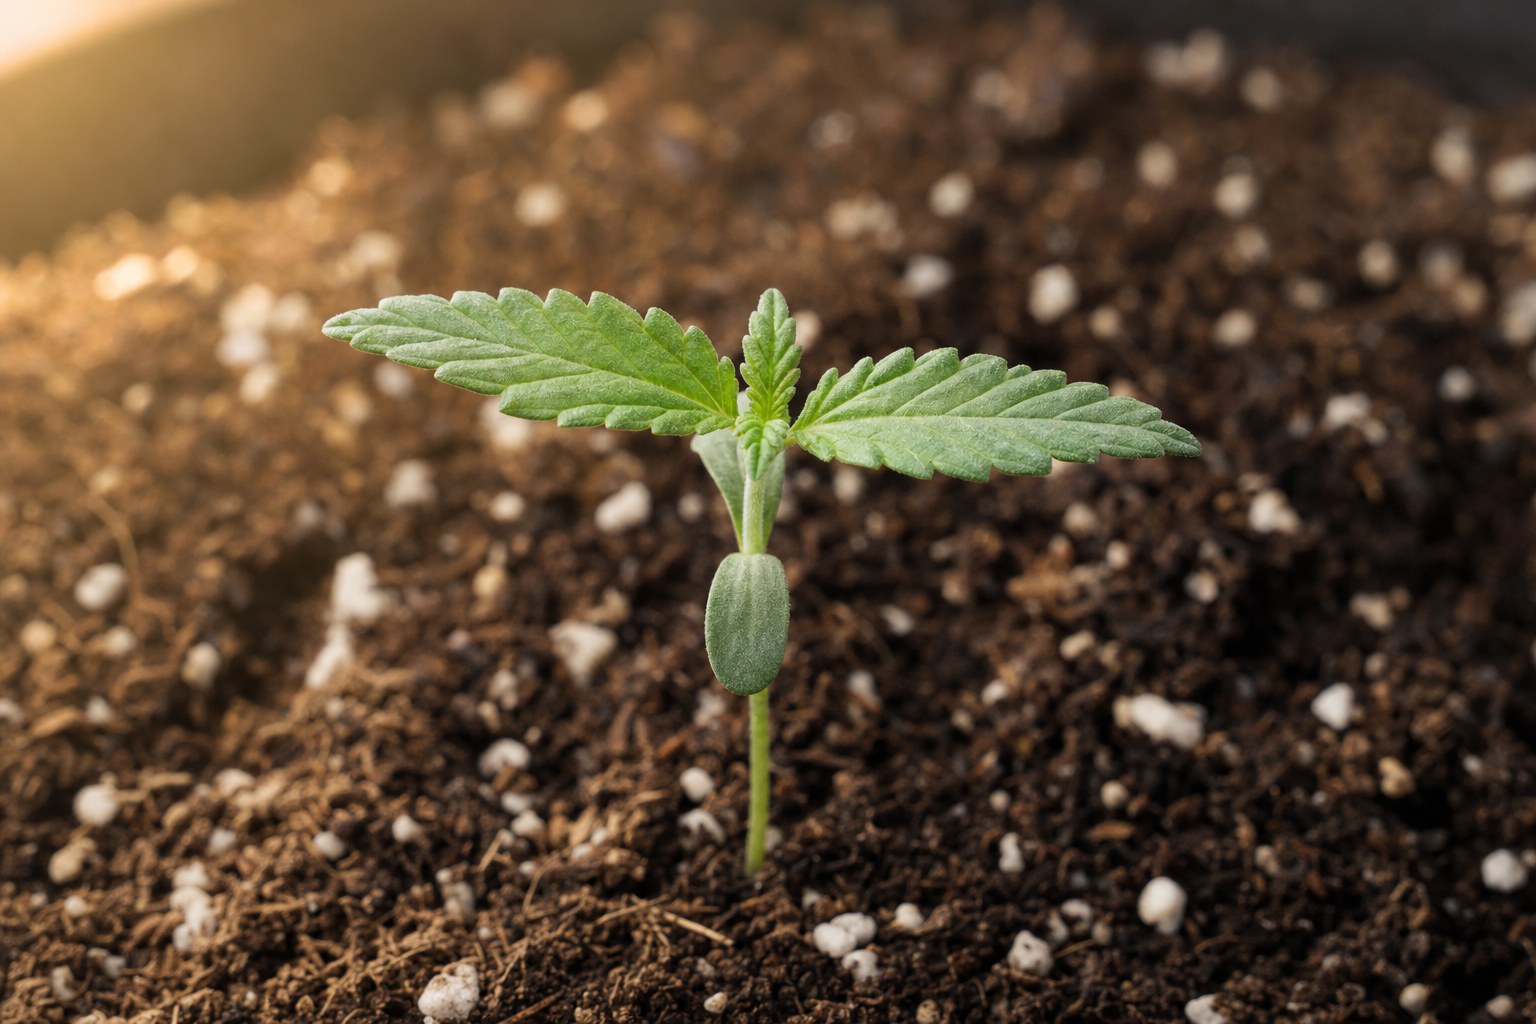
Cannabis seedling care during the first two weeks centres on soft, suitable light, evenly damp growing mix, gentle airflow and stable conditions. Check seedlings daily, respond to leaf posture and growth, and avoid heavy watering or feeding. Development varies, so favour small adjustments over rigid schedules. Always check current New Zealand law before undertaking cultivation.
By the Kiwi Seed Bank grow team
Key takeaways
- Check the law first: General cultivation information is not permission to grow cannabis.
- Keep moisture balanced: Seedling mix should be lightly and evenly damp, not saturated or left to become extremely dry.
- Read the plant: Upright growth, leaf colour and stem extension are more useful than relying on one fixed lamp distance.
- Maintain gentle movement: Mild airflow supports steady growth, but a strong draught can dry or stress a tiny seedling.
- Delay unnecessary inputs: Young seedlings usually need observation and environmental stability more than a complicated feeding routine.
Before you begin: check New Zealand’s current cannabis laws
Cannabis cultivation is generally unlawful in New Zealand unless it takes place under relevant legal authority. Rules and individual circumstances can change, so check current requirements before germinating or growing any seed. This article provides general horticultural information and does not state that cultivation is permitted where you live.
Read our overview of cannabis cultivation law in New Zealand and verify the position that applies to you. Property agreements, tenancy conditions and local obligations may also be relevant. Do not rely on an article, seed description or website as a substitute for checking your responsibilities.
Cannabis seedling care at a glance
The first fortnight begins when the shoot emerges from the growing medium. Two rounded cotyledons usually open first, followed by the first serrated true leaves. At this stage, the root system is small and the stem is delicate. Large swings in moisture, light intensity or temperature can therefore have an outsized effect.
A useful routine is simple: inspect the leaves and stem, feel or observe the surface moisture, check that air is moving gently, and note any change since the previous day. A short written record can reveal patterns that are easy to miss. Seedlings do not all progress at the same rate, even when started together.
Preparing for the first two weeks
Choosing a clean, stable growing space
Select a tidy space away from strong draughts, repeated handling and abrupt environmental changes. Clean containers, tools and surrounding surfaces reduce the amount of debris around delicate growth. Keep seedlings where they can be inspected without being knocked, chilled by an open window or exposed to intense afternoon heat through glass.
Stability matters more than chasing a supposedly perfect setting. If conditions vary through the day, observe the seedling during cool mornings, warm afternoons and evenings. A sheltered lawful setup gives you a better chance to identify how light, airflow and moisture are interacting.
Setting up containers and seedling mix
Use a small container with open drainage holes and a light, free-draining seedling mix. A large volume of wet medium can remain damp long after the young root has used the moisture close to it. A very compact mix may also hold too much water and leave fewer air spaces around developing roots.
Fill the container without compressing the mix firmly. After germination, position the seed according to the method being used and handle the emerging root as little as possible. Our guide to germinating cannabis seeds covers the stage before emergence.
Planning for New Zealand’s spring conditions
New Zealand spring can bring bright sun, cool nights, wind and rapid weather changes. A windowsill that appears mild in the morning may become hot in direct afternoon sun, while an outdoor spot can lose warmth quickly after sunset. Observe the actual location rather than assuming spring conditions are consistent.
If lawful cultivation is being considered, consult the broader guide on when to plant cannabis in New Zealand. Seasonal timing does not remove the need to assess a seedling’s immediate environment.
Days 1–3: settling newly emerged seedlings
Positioning seedlings under soft light
Once the shoot appears, provide gentle, suitable light so it can begin upright growth. Avoid suddenly placing a newly emerged seedling into harsh midday sun or beneath an intense lamp setting. Different light sources produce different levels of brightness and heat, so one universal distance is not reliable.
Watch the seedling’s response. A stem that lengthens rapidly while leaning towards the light may indicate that usable light is too weak or poorly positioned. Leaves that angle away, lose their comfortable posture or show pale, dry-looking areas may signal excessive intensity or heat. Change one factor gradually, then observe again.
Checking moisture without overwatering
Immediately after emergence, the small root occupies only part of the container. Adding water to the entire pot repeatedly can leave the mix saturated. Instead, assess moisture before acting. Look at the colour of the surface, feel the container’s weight and, where practical, check just below the top layer without disturbing the stem.
If water is needed, apply it slowly and allow it to spread through the nearby mix. Empty any standing runoff rather than leaving the container immersed. The goal is a lightly moist root area with drainage and air spaces, not a fixed daily watering event.
Supporting gentle airflow and stable conditions
Gentle air movement helps avoid stagnant conditions and encourages the stem to respond naturally. Air should move around the space rather than blast directly at the seedling. If the leaves shake continuously or the surface dries very quickly on one side, redirect or soften the airflow.
Keep the container clear of cold draughts and major overnight drops where possible. Avoid enclosing seedlings without ventilation, as trapped moisture can create persistently damp surfaces. Stability, cleanliness and regular observation are the priorities during these first days.
Days 4–7: watching the first true leaves develop
Reading seedling responses to light
During the remainder of the first week, the first true leaves should become easier to distinguish from the rounded cotyledons. Assess stem length, direction, leaf angle and colour each day. Healthy-looking seedlings commonly hold their leaves open towards the available light, although posture can shift over a normal daily cycle.
If the plant continues stretching, improve light exposure in small steps or adjust its position so illumination is more even. Do not compensate for several days of weak light with an abrupt jump in intensity. If leaves appear stressed, also consider heat, moisture and airflow before assuming light is the only factor.
Keeping moisture consistent as roots expand
The root zone expands during the first week, but the seedling still uses much less water than a mature plant. Water use may increase under brighter, warmer or breezier conditions and decrease during cool, dull spring weather. This is why a calendar alone cannot determine when irrigation is needed.
Compare the pot’s weight after watering with its weight as the surface begins to lighten. This develops a practical reference for that container and mix. Water gently enough that channels do not form around the stem, and avoid repeatedly wetting only one tiny point if the surrounding root zone is expanding.
Avoiding an early feeding rush
Cotyledons and a suitable seedling mix generally support early establishment, though mixes vary in their existing nutrient content. Adding strong inputs too soon can make it harder to interpret leaf changes. Do not assume rapid growth requires immediate feeding.
If using a pre-enriched medium, understand what it already contains before adding anything. When cotyledons naturally age later, that change alone does not mean a seedling needs a strong feed. Look at the whole plant, its growth trend and the condition of new leaves.
Days 8–14: building steady early growth
Monitoring new leaf sets and stem strength
In the second week, additional true leaves may begin to form and the stem should gradually become more substantial. Progress differs with genetics and environment, so avoid judging a seedling against a fixed photograph or promised timetable. Compare it with its own appearance on previous days.
Keep the light broadly centred to discourage repeated leaning. A container can be turned cautiously where appropriate, but frequent handling is unnecessary. Continue mild airflow without making the seedling bend sharply. If support is temporarily needed for a stretched stem, use a light touch and address the underlying environment as well.
Deciding whether feeding is appropriate
Some lightly charged media may require nutritional input earlier than richer mixes, while other seedlings will need none during this fortnight. Read the growing medium and input information available to you, then begin cautiously only if it is appropriate. More is not automatically better.
Leaf tips and new growth can change after an overly strong application, but similar signs may also relate to moisture, light or root-zone conditions. Avoid stacking several adjustments at once. Pause, review recent actions and change one variable so the response remains understandable.
Preparing for the next container stage
By the end of two weeks, some seedlings may be approaching the limits of a very small starter container, while others will not. Check for roots at drainage openings, unusually rapid drying and a balanced amount of foliage relative to the pot. One visible root does not always mean an immediate move is required.
When a move becomes appropriate, prepare the next container and mix before handling the plant. Keep the root mass together, support the container rather than pulling the stem, and return the seedling to suitable light after the move. Our general New Zealand cannabis growing guide explains the wider cultivation sequence.
Regional notes for a New Zealand spring
- Northern areas: Warm, humid spells may keep containers damp longer than expected. Check the root zone rather than watering from habit, and maintain gentle ventilation.
- Central and eastern areas: Strong sun and dry wind can change moisture quickly. Shield young plants from harsh exposure and reassess containers after warm afternoons.
- Lower North Island and South Island: Cool nights, wind and late cold snaps may slow early growth. Choose a stable, sheltered location and avoid abrupt outdoor exposure.
- Inland and elevated locations: Large day-to-night changes deserve close attention. A bright day does not guarantee a mild evening.
These are broad patterns, not forecasts. Local conditions, building orientation and the immediate growing space matter more than a regional label.
Common warning signs and useful checks
A long, thin or leaning stem
Review light strength, direction and duration, then consider whether airflow is too strong. Add support only if necessary and adjust the environment gradually. Burying a delicate stem deeply without considering moisture can create additional issues.
Drooping leaves
Drooping can occur when the mix is too wet, too dry, unusually hot or otherwise unsettled. Check moisture below the surface, container weight and recent environmental changes before adding water. Acting on one visual sign alone can worsen the original imbalance.
Pale, marked or misshapen growth
Inspect both older and newer leaves, the growing tip and leaf undersides. Review recent watering, feeding and light changes, and look for physical damage or tiny pests. Cotyledons may eventually fade as the plant develops, but early widespread colour loss deserves a broader environmental check.
Growth that appears stalled
Seedlings may pause above ground while roots develop, especially after environmental stress or handling. Confirm that drainage works, moisture is balanced and conditions are stable. Avoid repeatedly digging into the medium to inspect roots, as this can damage fragile growth.
A simple daily seedling routine
- Observe the stem, growing tip, leaf posture and colour.
- Check the medium’s surface and container weight before watering.
- Confirm that light is suitable and not adding excessive heat.
- Make sure airflow is gentle and no strong draught reaches the plant.
- Record any change and the action taken.
- Adjust one variable at a time, then allow time to observe the response.
Good cannabis seedling care is less about constant intervention and more about consistent attention. During the first two weeks, a clean space, balanced moisture, suitable light and cautious adjustments provide a sound foundation for the next growth stage. Keep checking current law, respect regional spring variation and let each seedling’s visible response guide your decisions.